
 www.woodsmithplans.com
 Opening: A Cleaner Workspace Awaits! Tired of sawdust coating every surface in your workshop? This step-by-step guide will show you how to build a workbench with a built-in dust collection system. Not only will this keep your workspace cleaner, but it'll also improve air quality, making your projects more enjoyable and healthier. This project requires intermediate woodworking skills and some familiarity with power tools. Let's get started!
Materials and Tools: Gather Your Supplies Before you begin, make sure you have all the necessary materials and tools. This will streamline the building process and prevent frustrating delays.
- Lumber: Plywood (3/4" and 1/4"), 2x4s, and hardwood edging (optional). Quantity depends on your desired workbench size. A common size is 4ft x 8ft.
- Dust Collector: Shop vacuum or dedicated dust collector unit. Consider CFM (Cubic Feet per Minute) rating.
- Dust Collection Fittings: Blast gates, hose connectors, flexible dust collection hose (4" diameter recommended), and adapters to fit your tools.
- Fasteners: Wood screws, nails, wood glue.
- Tools: Circular saw, table saw (optional but recommended), miter saw, drill/driver, measuring tape, level, clamps, safety glasses, dust mask, pencil.
Step 1: Build the Workbench Frame The frame provides the structural support for the entire workbench. Accuracy here is key to a stable and functional workspace.
- Cut the 2x4s to length according to your desired workbench dimensions. For a 4ft x 8ft bench, you'll need four 8ft pieces for the long sides and four 4ft pieces for the short sides.
- Assemble the rectangular frame using wood screws and wood glue. Ensure the corners are square using a framing square or by measuring the diagonals.
- Add internal support braces using more 2x4s, spaced evenly within the frame. These will help prevent sagging and provide support for the workbench top. Again, use screws and glue to secure them.
- Consider adding legs at this stage, constructing them from 4x4s or laminated 2x4s. Attach the legs to the inside corners of the frame with screws, ensuring they are plumb. Reinforce the leg joints with metal brackets if desired.
Step 2: Create the Workbench Top The workbench top is the work surface, and it needs to be flat, sturdy, and durable.
- Cut the 3/4" plywood to the desired size of your workbench top. You may need two sheets to cover the entire area.
- Attach the plywood to the frame using screws and glue. Ensure the plywood is flush with the edges of the frame.
- Optional: Add a second layer of 3/4" plywood for added thickness and durability.
- Optional: Apply hardwood edging to the perimeter of the workbench top. This will protect the edges of the plywood and give the workbench a more finished look. Use glue and clamps to secure the edging.
Step 3: Integrate the Dust Collection System This is the heart of the project – integrating the dust collection into the workbench. This step requires careful planning and precise execution.
- Determine the placement of your dust collection port(s). Common locations are at the back of the workbench, along the sides, or even integrated into a miter saw station within the workbench.
- Cut a hole(s) in the workbench top to accommodate the dust collection hose(s). Use a hole saw or jigsaw. The size of the hole will depend on the diameter of your hose.
- Build a plenum or enclosure beneath the workbench top to collect dust. This can be constructed from plywood or sheet metal. The plenum should be large enough to effectively capture dust from multiple tools.
- Connect the dust collection hose(s) to the port(s) on the workbench top and route them to the plenum. Use hose clamps to secure the connections.
- Connect your shop vacuum or dust collector to the plenum using a flexible hose. Ensure the connection is airtight.
- Install blast gates on each dust collection port to control airflow. This allows you to direct suction to the tool you are currently using.
Step 4: Add Finishing Touches The final touches will improve the workbench's functionality and aesthetics.
- Sand the workbench top to smooth out any rough edges or imperfections.
- Apply a protective finish to the workbench top, such as polyurethane or varnish. This will protect the wood from moisture and wear.
- Install additional features, such as drawers, shelves, or power outlets, to customize your workbench to your specific needs.
- Test your dust collection system to ensure it is working effectively. Make any necessary adjustments to the hose connections or blast gate settings.
Conclusion: Enjoy Your Cleaner, More Efficient Workspace Congratulations! You've successfully built a workbench with a built-in dust collection system. With a cleaner and more organized workspace, you can now focus on your projects with greater efficiency and enjoyment. Remember to regularly empty your dust collector and maintain your equipment to keep your system running smoothly. Happy woodworking!
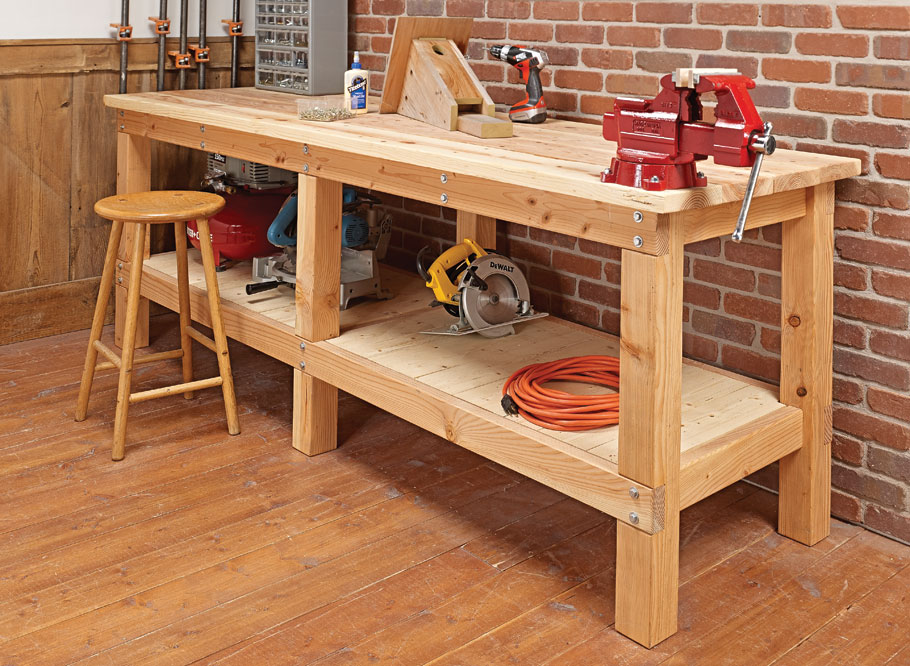
Heavy-duty Plank Workbench
www.woodsmithplans.com 14 Super-simple Workbenches You Can Build — The Family Handyman
 www.familyhandyman.com
 55" Workbench With Pegboard And Drawers, Dextra Height Adjustable Garage Work Bench With Power
 www.walmart.com


0 komentar:
Posting Komentar